
I was honored to work with one of my friends Charly's New Scrapkit called
"Splash of Sunflower" this is a great kit that envelopes cute lil bugs, and
primitive and country decor! This is a super easy tutorial so I hope you will
enjoy!
Things You Need:
- Scrap Kit "Splash of Sunflower" which you can purchase here at
Beach Bliss Scraps or on
Paradise 4 Scrappers - Alien Skin Xenofex 2, Constellation
(not a free plugin) a free demo can be found
HERE - Paint Shop Pro
(I used version 9) and Animated Shop
Getting Started:
Start off with a blank canvas of 500 x 500, take your magic wand and click on
the inside of this blank graphics so you have the marching ants all around it.
Now open up the green Picture Frame and click on it and then go to Edit then go
to Copy. Now go back and click on your black canvas and go to Edit and then
PASTE then INTO selection. This will paste your picture frame inside of our
blank canvas!
Now using your shapes tool we want to use our rectangular shape, pick the
background of your choice and make your foreground and background the color of
the background you choose. Now make a rectangle size make sure this will fit
nicely under our picture frame with NO stray edges hanging over. Once you have
your rectangle created go to your layers palette and move your rectangle shape
UNDER your picture frame .
Now open up your brown fence and resize this to 478 by 217 in height and place
this layer between our picture frame and the background layer. Now at this point
you can decorate as you see fit I add the potted sunflowers behind the fence and
I resized these to 105 by 231 and I added three potted plants. Then I added our
cute blue catepillar right behind our fence also I resized him to 115 by 98.
Then you can add your daisy to the top corner now when you add this make sure
you add a drop shadow on your daisies please see graphics below for my settings: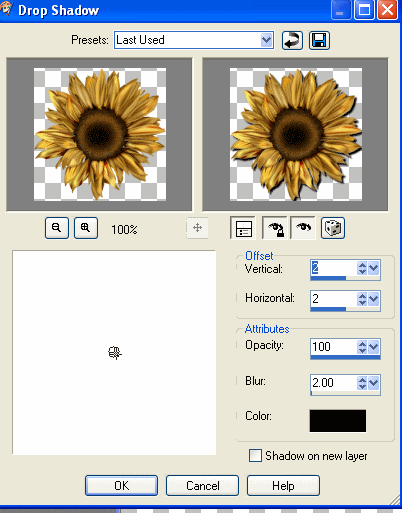
Use these same drop shadow settings on the bugs that you add to your tag! Now
once you are ready to start adding our sparkles I want you to go to LAYERS then
Merge Visible. Now go to Effects===>Alien Plug In----->Constallation and use the
following settings: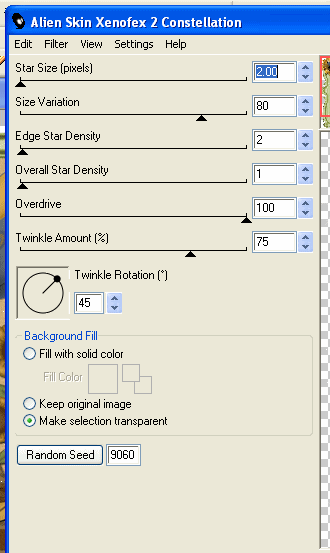
Star
Size=2.00
Size Variation-80
Edge Star Density-2
Overall Star Density-1
Overdrive-100
Twinkle Amount-75
Then click ok! Now let's merge visible and then go to EDIT and THEN COPY now
open up your Animation Shop and click PASTE as new animation, This is our first
layer of our animation!
Now go back to Paint Shop Pro and go to EDIT and click UNDO merge and then UNDO
constellation. Now go back to Edit to Plugins to Alien to Constallation and
let's do another layer but this time click the RANDOM SEED button this will put
our twinkles in diffrent spots! Then MERGE VISIBLE again go to EDIT and then
COPY and back to Animation Shop click on the frame where our first photo is and
go to EDIT ---PASTE AFTER FRAME this will be our second frame! Now go back and
repeat what we just did above to make a third layer and remember to hit RANDOM
seed so that you get twinkles in diffrent places again!
Now Paste that image into Animation shop and we are almost done! Now go to
EDIT---SELECT ALL then on our frame right click and go to FRAME PROPERTIES and
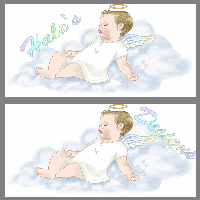
change that number from a 10 to 20. Now save and you are done! Here is what your
finished product should look like!

![Reblog this post [with Zemanta]](http://img.zemanta.com/reblog_e.png?x-id=cfe1ad8b-42d2-4126-a8eb-78c27023424c)




No comments:
Post a Comment